Halloween Window Painting Ideas to Turn Plain Glass into Haunted Scenes
Halloween is the perfect time to transform ordinary parts of your home into something mysterious, spooky, and unforgettable. While pumpkins, costumes, artificial cobwebs, and outdoor decorations are traditional favorites, Halloween window painting offers a creative way to turn plain glass into dramatic haunted scenes. With the right colors, brushes, templates, and a little imagination, an ordinary window can become a haunted house, creepy forest, graveyard, witch’s workshop, spooky castle, or even a scene filled with ghosts and monsters.
One of the biggest advantages of Halloween window painting is that it can create a major visual impact without requiring expensive decorations. You can work with washable window paint, acrylic markers designed for glass, temporary paint, or homemade mixtures depending on the type of surface and how permanent you want the design to be. Windows also provide a unique canvas because they interact with natural and artificial light. During the day, colorful paintings can look playful and artistic, while at night, lights inside the house can make silhouettes and spooky details appear dramatically.
This guide explores creative Halloween window painting ideas, techniques, color combinations, preparation tips, design concepts, family-friendly projects, spooky adult-oriented ideas, and ways to make your painted windows look professionally designed.
Why Halloween Window Painting Is a Great Decoration Idea
Halloween window painting combines creativity and decoration in one project. Instead of simply placing a decoration in front of a window, you can use the glass itself as the main feature.
Windows are naturally noticeable from both inside and outside. A painted design can therefore contribute to your home’s Halloween atmosphere without taking up floor, table, or shelf space.
Another advantage is flexibility. You can create a simple design with a few silhouettes or spend several hours creating an elaborate haunted scene. Window painting works equally well for houses, apartments, classrooms, stores, restaurants, offices, and community spaces.
For families, it can also become a Halloween activity. Children can help design ghosts, pumpkins, bats, stars, and friendly monsters while adults handle detailed painting.
Choosing the Right Window Paint
Before starting your Halloween masterpiece, choosing the right type of paint is important.
Washable Window Paint
Washable window paint is one of the easiest options for temporary Halloween decorations. It is designed specifically for glass and can usually be removed after the holiday with appropriate cleaning methods.
This is a practical choice if you want to decorate windows for a few weeks and return them to their original appearance afterward.
Glass Paint Markers
Glass markers are excellent for detailed drawings. They allow you to create outlines, lettering, facial expressions, spiderwebs, and other small elements.
They are particularly useful for people who prefer drawing instead of using broad paintbrushes.
Acrylic Paint
Acrylic paint can produce strong colors and detailed designs, but removal can vary depending on the product and surface. Always check whether the specific paint is appropriate for temporary glass decoration before using it.
Homemade Window Paint
Some people create temporary window paint using washable ingredients such as liquid dish soap mixed with washable paint or similar craft materials. Homemade mixtures can be useful for simple projects, but test a small area first to ensure the mixture behaves properly and cleans away easily.
Prepare the Window Before Painting
A clean surface makes a huge difference.
Dust, fingerprints, grease, and cleaning-product residue can prevent paint from applying evenly. Before painting, clean the inside of the window with an appropriate glass cleaner and allow it to dry completely.
Avoid touching the glass repeatedly after cleaning because fingerprints can create areas where paint does not adhere evenly.
If your window has condensation, wait until the surface is completely dry.
Use a Halloween Design Template
If you are not confident drawing directly onto glass, templates can make the process much easier.
Print or sketch your design on paper and place the paper behind the window. From the opposite side of the glass, you can trace the outlines.
This method is especially useful for:
- Haunted houses
- Witch silhouettes
- Bats
- Skeletons
- Graveyards
- Pumpkins
- Gothic lettering
- Spooky trees
- Cats
- Ghosts
- Spiderwebs
Tracing does not mean the final design has to look basic. You can use the traced outline as a foundation and then add shadows, highlights, textures, and details.
1. Haunted House Window Scene
One of the most classic Halloween window painting ideas is a haunted house.
Imagine a crooked old mansion surrounded by dead trees, a full moon, flying bats, and fog. The scene can cover most of the window and create the feeling that an entire haunted world exists behind the glass.
Start with a dark house silhouette. Add pointed roof sections, broken-looking windows, a chimney, and a crooked front door.
Behind the house, paint a large moon.
Use black or dark gray for the house and trees, while using pale yellow or white for selected windows. This contrast can make the haunted mansion appear illuminated from within.
Add small details such as:
- Bats flying across the moon
- Bare branches
- Grave markers
- Creeping vines
- A crooked fence
- A cat sitting near the doorway
- Ghostly figures
- Swirling fog
The result can look especially dramatic after sunset.
2. Full Moon and Flying Bats
For beginners, a full moon and bat scene is one of the easiest designs to create.
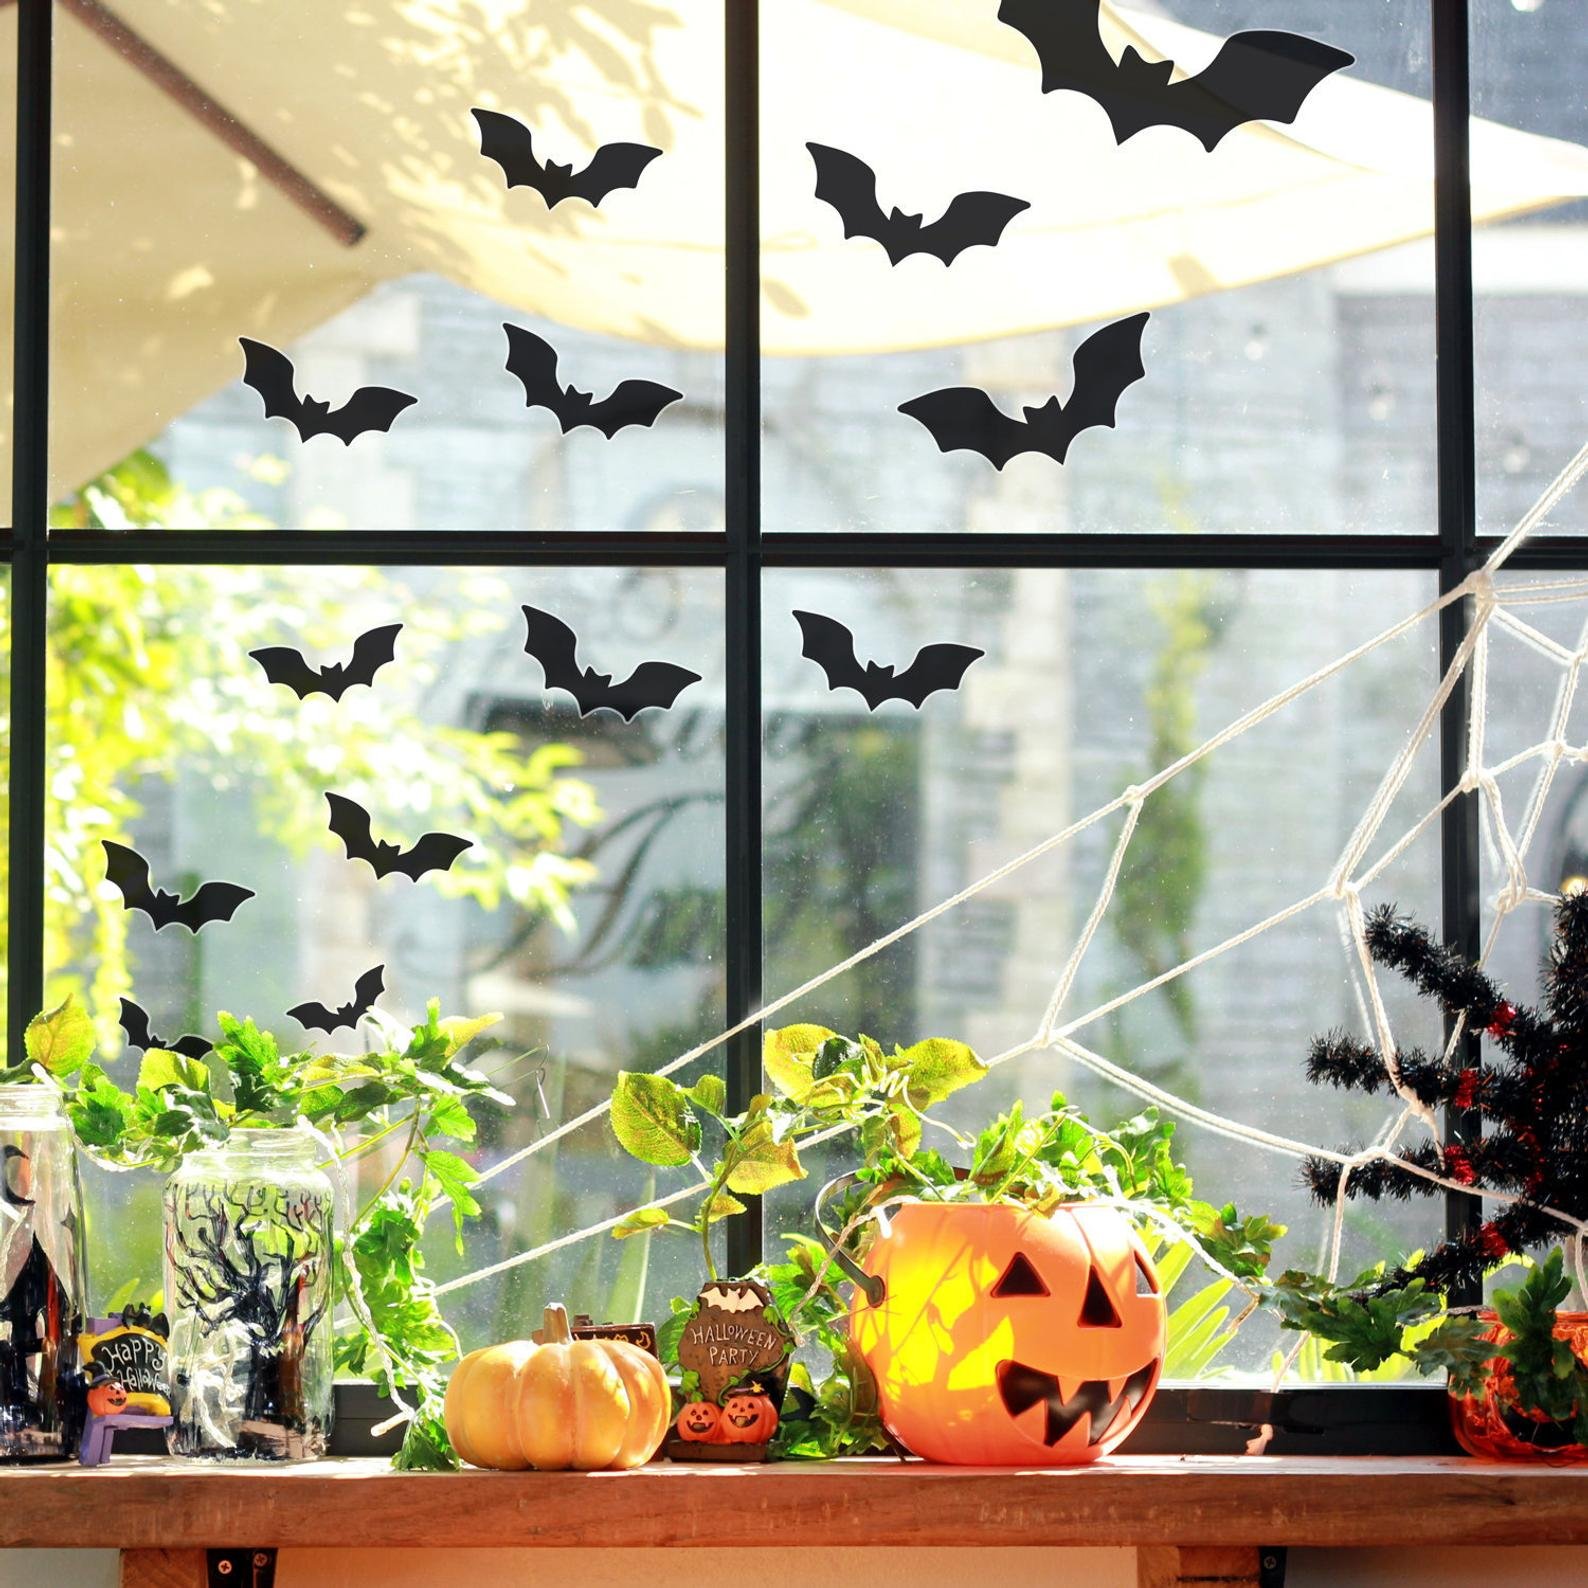
Paint a large pale moon in the center or upper portion of the window. Around it, add black silhouettes of bats in different sizes.
Do not make every bat identical.
Some can have wings fully extended, while others can be shown flying sideways or at different angles.
You can also paint small clouds across parts of the moon to make the scene more atmospheric.
For a sophisticated appearance, keep the color palette simple:
- Black
- White
- Gray
- Pale yellow
A minimalist design can sometimes look more dramatic than a window filled with dozens of colors.
3. Creepy Forest Silhouette
Turn your window into a mysterious forest.
Start by painting tall, twisted trees. Let their branches extend toward the top and sides of the glass.
The trees can have unusual shapes. Slightly curved trunks and long branches create a more haunted appearance than perfectly straight trees.
Add a moon behind the trees.
You can create depth by painting distant trees in lighter gray and foreground trees in darker black.
Add a few silhouettes of birds, bats, or a mysterious figure standing between the trees.
For extra atmosphere, use white or light gray paint to create mist near the bottom.
4. Haunted Graveyard Window
A graveyard scene is another classic Halloween design.
Paint several gravestones at different heights. Avoid arranging them in a straight row. Natural variation makes the scene more convincing.
Add:
- Crooked gravestones
- Iron fences
- Bare trees
- A full moon
- Fog
- Bats
- Ghosts
- Ravens
- Creeping vines
For gravestones, experiment with shapes. Some can be rounded, others rectangular, and some can have cracked edges.
You can add humorous or fictional inscriptions instead of realistic names.
A small sign saying “Beware” or “Enter If You Dare” can add a playful touch.
5. Ghosts Floating Across the Window
Ghosts are simple enough for children and beginners.
Use white paint to create floating ghost figures against a dark background.
The easiest ghost shape is a rounded head connected to a flowing body.
Add black eyes and mouths.
You can create different personalities:
- Happy ghost
- Surprised ghost
- Scared ghost
- Angry ghost
- Sleepy ghost
- Mischievous ghost
For a more artistic effect, create partially transparent-looking ghosts by using thinner layers of white paint.
Position them at different heights so that they appear to float across the entire window.
6. Witch Flying Across the Moon
A witch silhouette flying across a full moon can create a dramatic Halloween window.
Paint a large circular moon first. Once it dries, add the silhouette of a witch sitting on a broomstick.
You can make the witch’s hat clearly visible.
Add small bats around the moon and perhaps a few stars.
This design works particularly well on large windows because the moon provides a natural focal point.
7. Witch’s Potion Laboratory
For something more detailed, turn your window into a witch’s laboratory.
Paint shelves filled with bottles, jars, herbs, candles, and strange ingredients.
You can label fictional potion bottles with fun names such as:
- Moon Dust
- Dragon Breath
- Spider Juice
- Midnight Potion
- Witch’s Brew
- Ghost Mist
Add a large bubbling cauldron.
Green, purple, orange, and black can create a classic Halloween color palette.
You can also paint smoke rising from the cauldron and curling around the rest of the window.
8. Giant Spiderweb Window
A spiderweb design can cover an entire window without requiring complicated painting skills.
Begin by creating a central point.
Draw several lines radiating outward like spokes on a wheel.
Then connect the lines with curved sections to form the web.
Paint a large spider in one corner.
For extra detail, add a few smaller spiders.
You can also paint tiny water droplets on sections of the web using white or pale blue.
This can create a beautiful effect when light passes through the window.
9. Giant Spider Crawling Across the Glass
Take the spiderweb concept further by painting a giant spider across the window.
Use black for the body and legs.
Make the spider large enough to be visible from outside.
For a more dramatic design, paint the spider as though it is crawling toward the viewer.
You can position the legs so that some extend toward the edges of the window.
Add a web behind it to create context.
10. Pumpkin Patch Scene
Not every Halloween window has to be frightening.
A pumpkin patch can create a warm and family-friendly Halloween atmosphere.
Paint several pumpkins across the bottom of the window.
Give each pumpkin a different face.
Some can be smiling, while others can look surprised or mischievous.
Add orange leaves, vines, and a wooden fence.
A moonlit background can transform the cheerful pumpkin patch into a slightly spooky nighttime scene.
11. Jack-o’-Lantern Faces
If you want a quick project, paint large jack-o’-lantern faces directly onto the glass.
Use orange as the main color and black for the eyes and mouths.
Try different expressions.
One pumpkin could look frightened.
Another could look angry.
Another could have a giant smile.
You can place smaller pumpkins around the main design.
12. Skeleton Silhouette
Skeletons can be challenging, but they create impressive Halloween artwork.
Instead of painting every bone individually, start with a simplified silhouette.
You can create a skeleton dancing, walking, sitting, or waving.
A dancing skeleton can be especially fun for children’s rooms or party spaces.
Add a few musical notes around it to create a playful scene.
13. Skeleton Band
Turn your window into a Halloween concert.
Paint several skeletons playing instruments.
You might include:
- Guitar
- Drums
- Piano
- Saxophone
- Trumpet
Add a sign such as “Halloween Night” above the band.
This idea works particularly well for parties.
14. Gothic Castle
Create a mysterious medieval castle across your window.
Paint tall towers, pointed roofs, narrow windows, and stone walls.
Place a full moon behind the castle.
Add ravens flying around the towers.
You can also paint a bridge leading toward the castle entrance.
Dark purple, black, gray, and deep blue can create a dramatic gothic atmosphere.
15. Dracula’s Castle
A Dracula-inspired castle can become the centerpiece of a Halloween window.
Use tall, narrow towers and dramatic architecture.
Add bats around the roof.
Paint glowing windows using yellow or pale orange.
You can also add a silhouette of a mysterious figure standing near the entrance.
Keep the design more atmospheric than graphic.
16. Friendly Monster Window
For younger children, create a colorful monster scene.
Paint monsters in purple, green, orange, and blue.
Give them funny expressions instead of frightening ones.
You can include:
- One-eyed monsters
- Three-eyed monsters
- Furry monsters
- Tiny monsters
- Giant smiling monsters
Add colorful stars, pumpkins, and candy around them.
17. Halloween Candy Shop
A Halloween candy shop can be a fun alternative to traditional haunted scenes.
Paint shelves filled with candy.
Add jars, lollipops, cupcakes, cookies, and chocolate bars.
Use bright colors to make the window look cheerful.
A sign reading “Spooky Sweets” can complete the design.
This is especially suitable for restaurants, classrooms, children’s parties, or family homes.
18. Trick-or-Treat Scene
Paint children carrying Halloween baskets while walking toward decorated houses.
Add pumpkins along the sidewalk.
You can paint falling leaves and a large moon in the background.
This scene tells a story and can make your window feel like a miniature Halloween movie.
19. Haunted Street
Instead of focusing on one object, create an entire haunted street.
Paint several houses in the background.
Add street lamps, fences, trees, pumpkins, and silhouettes.
You can create depth by making the distant buildings lighter and foreground objects darker.
A mysterious fog layer can connect the whole scene.
20. Creepy Window Within a Window
This idea is particularly clever.
Paint a fictional haunted window frame directly onto your actual window.
Inside that painted frame, create a scene showing a ghost, monster, or mysterious person looking outward.
It creates the illusion that another haunted building exists behind your window.
You can add cracked glass effects using removable paint.
21. Haunted Eyes in the Darkness
For a minimalist Halloween decoration, paint a dark background and add pairs of glowing eyes.
Use different eye shapes and colors.
You might show:
- Cat eyes
- Monster eyes
- Ghost eyes
- Witch eyes
- Owl eyes
Keep the surrounding area mostly dark.
This design can be surprisingly effective at night.
22. Black Cat and Crescent Moon
Paint a large crescent moon near the top of the window.
Below it, paint a black cat sitting on a fence.
Add a few stars.
The cat can be shown looking toward the moon.
This simple composition has a classic Halloween appearance without becoming overly complicated.
23. Haunted Tree
A single large haunted tree can become a striking window design.
Paint a thick, twisted trunk.
Extend long branches across the window.
Add a few hanging lanterns or bats.
You can also place a small owl on one branch.
For a more mysterious effect, add a shadowy figure standing beneath the tree.
24. Owl in the Moonlight
Paint a large owl sitting on a branch with a full moon behind it.
Use dark colors for the owl’s silhouette.
Highlight the eyes with a small amount of yellow or white.
Add leaves and branches around the edges.
This design can look elegant rather than frightening.
25. Halloween Quotes and Lettering
Sometimes words can become the main decoration.
Paint large Halloween phrases such as:
“Happy Halloween”
“Enter If You Dare”
“Beware”
“Trick or Treat”
“Spooky Season”
“Something Wicked This Way Comes”
Use gothic, handwritten, or playful lettering.
Surround the words with bats, spiders, pumpkins, or leaves.
How to Create Depth in Window Paintings
A common mistake is placing every element at the same visual level.
To create depth, divide your scene into layers.
Background
The background could include:
- Moon
- Clouds
- Distant buildings
- Stars
- Fog
Middle Ground
The middle ground could contain:
- Trees
- Houses
- Fences
- Graveyards
Foreground
The foreground could contain:
- Pumpkins
- Skeletons
- Cats
- Spiders
- People
- Tombstones
This layered approach makes a flat window look more like a three-dimensional scene.
Choosing a Halloween Color Palette
Traditional Halloween colors include orange, black, purple, green, and white.
However, you do not have to use all of them.
Classic Palette
Black + orange + white
This combination creates a traditional Halloween appearance.
Gothic Palette
Black + dark purple + gray + white
This is ideal for haunted castles and mysterious scenes.
Witchy Palette
Purple + green + black + orange
Perfect for potion bottles, witches, and magical scenes.
Elegant Halloween Palette
Black + white + metallic-looking gold or silver
This works well for sophisticated adult Halloween parties.
Children’s Palette
Orange + purple + green + yellow + white
Bright colors can make spooky scenes fun rather than frightening.
Painting Techniques for Better Results
Use Thin Layers
Applying too much paint at once can cause dripping.
Thin layers provide greater control.
Let Layers Dry
If you are creating a detailed scene, allow major sections to dry before adding smaller details.
Use Different Brush Sizes
Large brushes are useful for backgrounds.
Medium brushes work well for trees, houses, and pumpkins.
Fine brushes are ideal for:
- Eyes
- Webs
- Letters
- Cracks
- Facial expressions
Use Sponges for Fog
A sponge can create a soft fog effect.
Apply a small amount of white or gray paint and gently dab it onto the glass.
Avoid creating a solid block of paint.
Use Cotton Swabs for Highlights
Cotton swabs can help remove tiny areas of wet paint and create highlights or texture.
How Lighting Changes Your Window Painting
Lighting is one of the most important parts of Halloween window decoration.
During the day, natural sunlight can illuminate the colors.
At night, indoor lighting can make painted silhouettes visible from outside.
You can experiment with room lighting to see how your design changes.
A warm light behind an orange pumpkin scene can create a cozy appearance.
Cool white lighting behind a graveyard can create a more mysterious atmosphere.
Avoid extremely bright lighting if you want subtle shadows.
Add Curtains to Enhance the Scene
Painted windows can be combined with curtains.
For example, use dark curtains around a haunted house design.
Open the curtains partially so the painting remains visible.
For a witch scene, deep purple or black curtains can complement the colors.
For a children’s Halloween display, orange curtains can add warmth.
Add Removable Silhouettes
You do not have to paint everything.
Combine painted elements with removable paper or vinyl silhouettes.
For example, paint the moon and clouds but use removable bat silhouettes.
This creates texture and makes the window easier to decorate.
Halloween Window Painting for Apartments
Apartment residents can still create impressive Halloween windows.
Because outdoor space may be limited, window painting is especially useful.
Focus on designs that are clearly visible from outside.
Good apartment ideas include:
- Large pumpkins
- Ghosts
- Bats
- Haunted houses
- Gothic lettering
- Black cats
- Moon scenes
Keep the design within your window area and use removable materials if your rental agreement restricts permanent decoration.
Halloween Window Painting for Children’s Rooms
Children’s rooms benefit from friendly Halloween designs.
Try:
- Smiling ghosts
- Cute pumpkins
- Friendly monsters
- Cartoon bats
- Happy witches
- Colorful candy
- Funny skeletons
Avoid making the design too dark if the child is easily frightened.
You can even allow children to draw some of the characters themselves.
Halloween Window Painting for Classrooms
Windows can become educational and creative displays.
Teachers can organize a Halloween art project where students contribute individual elements.
For example:
One student paints pumpkins.
Another creates bats.
Another makes ghosts.
Another paints leaves.
The teacher can arrange them into one large scene.
This encourages teamwork and creativity.
Halloween Window Painting for Shops
Businesses can use painted windows to attract attention during Halloween.
A café could paint:
- Halloween drinks
- Pumpkins
- Coffee cups
- Ghosts
- Spooky lettering
A clothing store could create a gothic fashion display.
A bakery could paint cakes, cupcakes, candy, and Halloween characters.
The key is to keep important business information visible.
Do not cover logos, opening hours, or essential signage.
Halloween Window Painting for Restaurants
Restaurants can use windows to establish a seasonal atmosphere.
A family restaurant might use cheerful pumpkins and ghosts.
A more sophisticated restaurant might choose black-and-white gothic artwork.
A dessert shop could create a colorful candy-themed window.
Consider matching the window artwork with the interior décor.
Simple Halloween Window Painting for Beginners
If you are new to painting, start small.
Choose one main object:
- Pumpkin
- Ghost
- Bat
- Cat
- Spiderweb
- Moon
Create a clean silhouette instead of attempting a complicated scene.
Once you become comfortable, add more elements.
A simple, well-designed window can look better than an overcrowded one.
Advanced Halloween Window Painting
Experienced artists can create highly detailed scenes.
Consider painting:
- Multiple layers
- Realistic shadows
- Architectural details
- Reflections
- Fog
- Textured trees
- Character silhouettes
- Detailed costumes
You can create an entire story across several windows.
For example, one window could show a haunted forest.
The next could show a castle.
The third could show a graveyard.
Together they become one connected Halloween world.
Creating a Story Across Multiple Windows
Multiple windows give you the opportunity to tell a story.
Window One:
A mysterious forest.
Window Two:
A path leading to a haunted mansion.
Window Three:
The mansion entrance.
Window Four:
A graveyard behind the house.
Window Five:
The full moon and flying bats.
This approach is excellent for large homes, schools, restaurants, and community buildings.
Use Negative Space
You do not need to paint every part of the glass.
Negative space can make your artwork more interesting.
For example, paint only the silhouettes of trees while leaving the moon completely clear.
The natural glass becomes part of the artwork.
This technique can make the design look cleaner and more professional.
Avoid Overcrowding the Window
A common mistake is trying to include every Halloween symbol.
If you have pumpkins, bats, witches, ghosts, skeletons, spiders, monsters, castles, and graveyards all competing for attention, the design may become confusing.
Choose one main theme.
Then add two or three supporting elements.
For example:
Main theme: Haunted house
Supporting elements:
- Moon
- Bats
- Trees
That is enough to create a strong composition.
Create a Focal Point
Every good window painting should have a focal point.
The focal point could be:
- A giant moon
- Haunted house
- Witch
- Skeleton
- Pumpkin
- Ghost
Make the focal point larger or brighter than surrounding elements.
This naturally guides the viewer’s attention.
Halloween Window Painting Mistakes to Avoid
Painting on Dirty Glass
Dirt makes paint uneven.
Always clean first.
Using Too Much Paint
Thick paint can drip.
Work with controlled layers.
Ignoring the View From Outside
A design that looks excellent from inside may appear different from outside.
Check both perspectives.
Using Too Many Colors
Too many colors can weaken the Halloween atmosphere.
Choose a coordinated palette.
Forgetting Drying Time
Touching wet paint can create accidental smudges.
Give each layer enough time to set.
Painting Permanent Designs Without Planning
If the decoration is temporary, make sure your materials are appropriate for removable artwork.
Always test unfamiliar products on a small area first.
How to Remove Halloween Window Paint
Removal depends on the product you used.
For washable window paints, follow the manufacturer’s cleaning instructions.
For temporary craft mixtures, a damp cloth may be sufficient.
For stubborn residue, use a suitable glass-cleaning method.
Avoid aggressive scraping or harsh chemicals that could damage window frames, coatings, seals, or nearby surfaces.
If you are renting, choose removable products from the beginning.
How to Make Window Paint Last Longer During Halloween
Indoor windows generally protect artwork from weather.
However, condensation and repeated touching can affect the design.
Keep painted areas dry.
Avoid placing fans directly toward wet paint.
Do not repeatedly wipe the glass.
If condensation forms, gently address moisture around the design rather than rubbing directly over the painted sections.
DIY Halloween Window Painting Kit
A basic kit can include:
- Washable window paint
- Glass-safe markers
- Small paintbrushes
- Medium paintbrushes
- Large brush
- Sponge
- Paper towels
- Cleaning cloth
- Printed templates
- Painter’s tape
- Water container
- Pencil
- Measuring ruler
You do not need expensive professional equipment.
Creativity and careful planning matter more than having a large collection of tools.
Using Painter’s Tape for Clean Lines
Painter’s tape can help create straight lines around borders.
For example, you can create a gothic window frame effect.
Tape the edges, paint the interior design, and carefully remove the tape after the paint has set appropriately.
Make sure the tape is suitable for the surface and does not leave residue.
Halloween Window Borders
If you do not want to cover the entire window, create a border.
Ideas include:
- Spiderweb border
- Autumn leaf border
- Pumpkin border
- Bat border
- Gothic ornament border
- Candy border
Keep the center of the glass clear.
This creates an elegant decorative frame.
Halloween Window Corner Designs
Small corner decorations are ideal for minimalist homes.
Paint a spiderweb in one corner.
Add a spider hanging from it.
Or create a small crescent moon with a black cat.
This gives your window seasonal character without overwhelming the room.
Halloween Silhouette Parade
Create a row of characters across the bottom of your window.
You might include:
- Witch
- Cat
- Ghost
- Skeleton
- Monster
- Pumpkin
Keep them as simple silhouettes.
This can look especially good when the room behind the window is brightly lit.
Haunted Carnival Window
For something unusual, create a haunted carnival.
Paint:
- Ferris wheel
- Circus tent
- Clown silhouette
- Balloons
- Spooky lights
- Haunted signs
Use dark colors with small bright accents.
The carnival theme can be playful while still creating a mysterious atmosphere.
Underwater Halloween Scene
For an unconventional Halloween design, imagine a haunted underwater world.
Paint:
- Ghostly fish
- Sea monsters
- Sunken treasure
- Skeletons
- Seaweed
- A mysterious shipwreck
Use deep blue, green, black, and white.
This can be particularly creative for bathrooms or children’s spaces.
Space Halloween Scene
Combine Halloween with outer space.
Paint:
- Moon
- Stars
- Witch flying through space
- Floating pumpkins
- Ghost astronauts
- Strange planets
This imaginative theme is perfect for children.
Halloween Movie Theater Window
Turn a window into a fake movie screen.
Paint a spooky film title such as “Midnight at the Haunted House.”
Then create a scene beneath the title.
Add decorative stars or theater curtains around the edges.
This could work beautifully for a Halloween party.
Rustic Halloween Window
For a farmhouse or rustic interior, choose natural Halloween colors.
Use:
- Brown
- Orange
- Cream
- Black
- Dark green
Paint pumpkins, dried leaves, branches, and a rustic wooden sign.
This creates a warm autumn atmosphere rather than an extremely scary look.
Elegant Gothic Window
If you prefer sophisticated Halloween décor, keep the design monochromatic.
Use black and white.
Paint:
- Gothic arches
- Ravens
- Roses
- Bats
- Candles
- Ornamental patterns
Avoid cartoon-like characters.
This style can complement modern or elegant interiors.
Cute Halloween Window
Cute Halloween designs are increasingly popular for families.
Try:
- Smiling pumpkins
- Baby ghosts
- Cute black cats
- Tiny witches
- Friendly bats
- Candy
- Colorful stars
Use rounded shapes and bright colors.
Glow-Inspired Window Painting
Although regular window paint does not necessarily glow, you can create a glow illusion.
Paint a bright moon or lantern.
Then gradually transition into darker colors around it.
This creates the appearance of light spreading into darkness.
For actual glowing effects, only use products specifically designed and safe for glass and the intended environment.
Add a Painted Reflection
An advanced technique is to paint a figure or object so it appears reflected.
For example, paint a ghost near a fictional window frame and add a faint duplicate shape nearby.
This can create a mysterious visual effect.
Halloween Window Scene With Fog
Fog is one of the easiest ways to make a scene more atmospheric.
Use translucent-looking white or gray strokes near the bottom.
Let the fog partially cover:
- Trees
- Grave markers
- Houses
- Feet
- Fences
This creates depth.
Moonlight Technique
For a moonlit scene, paint the moon first.
Use a pale color.
Then place darker objects in front of it.
The contrast between the bright circle and dark silhouettes creates an immediate Halloween mood.
Sunset Halloween Scene
Halloween does not have to happen at midnight.
Create a sunset background using orange, red, purple, and dark blue.
Place black silhouettes of trees and houses in front.
This can create a dramatic autumn atmosphere.
Autumn Leaves and Halloween
Combine fall décor with Halloween.
Paint orange, yellow, red, and brown leaves around the edges.
Place pumpkins beneath them.
Add a few bats to connect the autumn and Halloween themes.
This is ideal if you want seasonal décor that feels warm and sophisticated.
Halloween Window Painting for Small Windows
Small windows require simplified compositions.
Choose one main object.
A large moon, pumpkin, ghost, or cat can fill the space effectively.
Avoid excessive detail.
Use strong shapes that remain visible from a distance.
Large Window Design
Large windows give you room to create a complete scene.
Divide the window mentally into sections.
Top:
Moon and sky.
Middle:
House, trees, bats.
Bottom:
Graveyard, pumpkins, fence, fog.
This gives the artwork structure.
Halloween Window Painting on Glass Doors
Glass doors can become excellent Halloween canvases.
Create vertical designs that guide the viewer’s eye from top to bottom.
For example:
Top: bats
Middle: haunted house
Bottom: pumpkins and fog
Leave handles and frequently touched areas clear.
Halloween Window Painting for Offices
Keep office decorations tasteful.
Use subtle designs such as:
- Black cats
- Small pumpkins
- Minimal spiderwebs
- Gothic lettering
- Autumn leaves
Avoid covering important workplace information or creating decorations that interfere with visibility.
Halloween Window Art as a Family Tradition
Window painting can become an annual family activity.
Each year, choose a different theme.
Year One:
Haunted house.
Year Two:
Witch’s laboratory.
Year Three:
Spooky forest.
Year Four:
Haunted carnival.
Year Five:
Monster city.
Take photographs each year and compare the designs.
Children can gradually develop their artistic skills.
Budget-Friendly Halloween Window Painting
You do not need a large budget.
Use a small collection of washable colors and focus on silhouettes.
Black, white, orange, and purple can create dozens of different designs.
Instead of buying many decorations, invest in reusable brushes and templates.
Professional-Looking Window Painting on a Budget
The secret to professional-looking artwork is organization.
Plan the composition first.
Choose a limited palette.
Create clean outlines.
Work from large shapes to small details.
Allow adequate drying time.
Keep spacing balanced.
A simple design executed carefully will often look more polished than a complicated design painted without planning.
Photographing Your Halloween Window Art
If you want to share your artwork online, photograph it during both day and night.
During daylight, colors are easier to see.
At night, the lighting can create atmosphere.
Turn off unnecessary lights behind the window if they distract from the design.
Take a straight-on photograph to show the full composition.
Halloween Window Painting for Social Media
A decorated window can make excellent seasonal content.
You can create a short time-lapse showing:
- Cleaning the window
- Sketching the design
- Painting the background
- Adding silhouettes
- Adding details
- Turning on the lights
- Revealing the final scene
This can turn a simple home project into engaging Halloween content.
25 Quick Halloween Window Ideas
If you need inspiration quickly, consider these simple concepts:
- Full moon with bats
- Black cat on a fence
- Haunted house
- Graveyard
- Flying witch
- Spiderweb
- Giant spider
- Friendly ghosts
- Pumpkin patch
- Jack-o’-lantern faces
- Skeleton dance
- Gothic castle
- Creepy forest
- Witch’s laboratory
- Haunted carnival
- Halloween candy shop
- Trick-or-treat street
- Owl in moonlight
- Haunted tree
- Monster family
- Ghostly castle
- Autumn leaves and pumpkins
- Gothic lettering
- Haunted street
- Moonlit cemetery
Step-by-Step Beginner Halloween Window Project
Here is a simple project you can complete without advanced painting skills.
Step 1: Choose the Theme
Select a haunted house with a moon and bats.
Step 2: Clean the Glass
Remove dust and fingerprints.
Step 3: Draw the Moon
Paint a large circle near the upper center.
Step 4: Add the House
Paint the main silhouette in front of the moon.
Step 5: Add Trees
Place trees around both sides.
Step 6: Add Bats
Paint small bats around the moon.
Step 7: Add Ground Details
Create a fence, pumpkins, and gravestones.
Step 8: Add Fog
Use light gray or white paint near the bottom.
Step 9: Add Small Details
Include windows, branches, stars, cracks, and shadows.
Step 10: Let It Dry
Give the artwork sufficient time before touching it.
Step 11: Test the Lighting
View the window from inside and outside.
Step 12: Make Final Adjustments
Add details only where they improve the composition.
How to Make Your Halloween Window Stand Out
The strongest Halloween window designs usually have three characteristics: a clear theme, strong contrast, and thoughtful composition.
You do not need to fill every inch of glass.
A large moon surrounded by dark silhouettes can be more dramatic than a window covered in dozens of unrelated Halloween characters.
Think like a scene designer.
Ask yourself:
Where should people look first?
What tells the story?
Where should the eye move next?
Which areas should remain quiet?
These questions can dramatically improve your final result.
Combining Paint With Other Decorations
Window painting can work together with physical decorations.
Combine a painted haunted forest with:
- Real artificial leaves
- Hanging bats
- Small pumpkins
- String lights
- Fake spiderwebs
- Decorative lanterns
However, avoid blocking the painted scene.
The goal is to make each element support the overall design.
Creating a Haunted House Illusion
One particularly impressive idea is to make the window look like it belongs to a haunted house.
Paint an old window frame, cracked wooden boards, cobwebs, and a mysterious figure behind the glass.
The actual window becomes part of the illusion.
This works especially well for Halloween parties.
Creating a Ghostly Handprint Effect
A simple spooky idea is to create ghostly hand silhouettes.
Use pale white paint to create hand shapes on the glass.
Place several hands at different heights.
You can make them appear as though something is trying to reach through the window.
For a family-friendly version, make the hands cartoon-like.
Haunted Mansion Ballroom
Create a gothic ballroom visible through your painted window.
Paint tall curtains, chandeliers, silhouettes of dancers, and a large staircase.
Add a mysterious figure standing at the far end.
This advanced scene can become a conversation piece.
Halloween Window Painting With Typography
Typography can be the central feature.
Choose a bold phrase and surround it with decorative elements.
For example:
“WELCOME TO THE HAUNTED HOUSE”
Use gothic letters.
Place bats above the text and spiderwebs around the corners.
This is excellent for entrance windows.
Minimalist Halloween Window
Minimalism can work beautifully for Halloween.
Paint only:
- One black cat
- One crescent moon
- Three bats
Leave everything else clear.
The empty glass becomes part of the design.
Modern Halloween Window
For a contemporary home, use geometric shapes.
Create abstract pumpkins, moons, stars, and bats.
Use black, white, and one accent color.
This produces a modern seasonal appearance without making the room feel overly themed.
Final Tips for a Successful Halloween Window Painting Project
Before you begin, remember a few important principles.
First, plan your design.
Second, clean the glass thoroughly.
Third, choose appropriate temporary materials if you want the decoration removed after Halloween.
Fourth, start with large shapes.
Fifth, build details gradually.
Sixth, use contrast.
Seventh, avoid overcrowding.
Eighth, check the artwork from outside.
Ninth, consider how natural and artificial lighting will affect it.
Finally, enjoy the process.
Halloween window painting is not about creating a technically perfect artwork. It is about transforming an ordinary surface into something imaginative and seasonal.
Conclusion
Halloween window painting is one of the most creative ways to decorate a home, classroom, business, restaurant, or apartment for the spooky season. A plain glass window can become a haunted mansion, mysterious forest, moonlit graveyard, witch’s laboratory, pumpkin patch, gothic castle, or playful monster world with nothing more than paint, brushes, and imagination.
The best projects begin with a clear concept. Decide whether you want your window to feel frightening, mysterious, elegant, funny, colorful, or family-friendly. From there, select a suitable color palette and build the artwork gradually.
Beginners can start with simple silhouettes such as bats, pumpkins, ghosts, cats, and spiderwebs. More experienced artists can create complete scenes with multiple layers, atmospheric fog, detailed architecture, characters, and storytelling.
Lighting can make a major difference. A design that looks simple during the day can become dramatic when illuminated from behind at night. This is one reason window painting is so effective for Halloween.
You can also combine painted designs with curtains, lights, pumpkins, artificial cobwebs, removable silhouettes, and other seasonal decorations. However, remember that a successful design does not need to cover every inch of glass. Negative space, contrast, and a strong focal point can make the artwork look more polished.
Whether you are decorating a small apartment window or creating an elaborate display across multiple windows, Halloween window painting provides an inexpensive and flexible way to bring spooky creativity into your space.
With a little preparation and imagination, plain glass can become the backdrop for an entire Halloween story—and your window may become one of the most memorable decorations in your home.